Earwigs are showing up in your basement again. You’ve seen them in the bathroom at night, and you want to know what to do. After four years as a registered technician in the DMV area, I’ve helped many homeowners tackle these moisture-loving pests through trapping and treatment.
Earwig traps offer a non-toxic way to control these night-active insects without relying only on chemicals. Our family business has served the DMV for over 50 years, and we’ve seen how earwig numbers spike after warm, wet springs.
Why Use Earwig Traps?
Traps let you target specific problem areas without treating your whole property. They also work as monitoring tools that help you find entry points and track population trends.
Our humid climate and clay-heavy soils create ideal earwig conditions. When moisture levels spike, they head indoors. Traps give fast relief while you work on the root causes.
Combining traps with moisture control gives better long-term results than spraying alone. You’re hitting the problem from multiple angles.
Identifying Earwigs
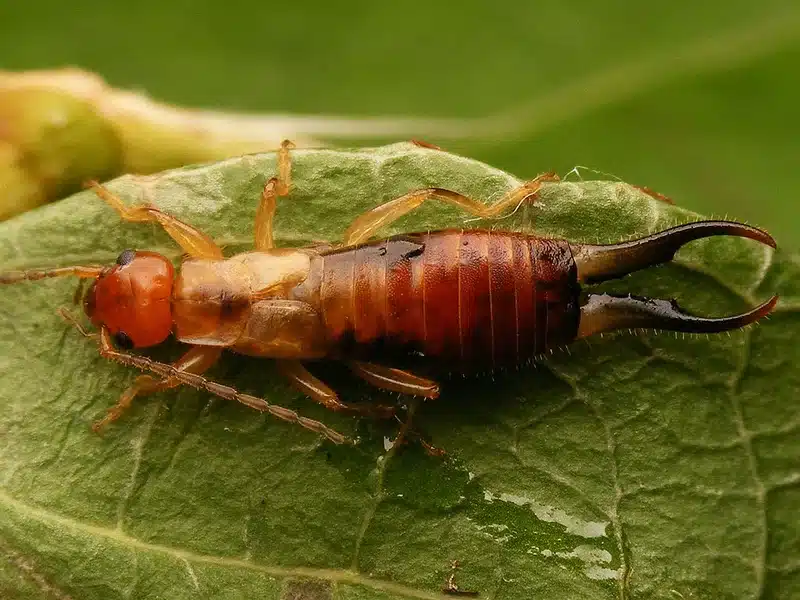
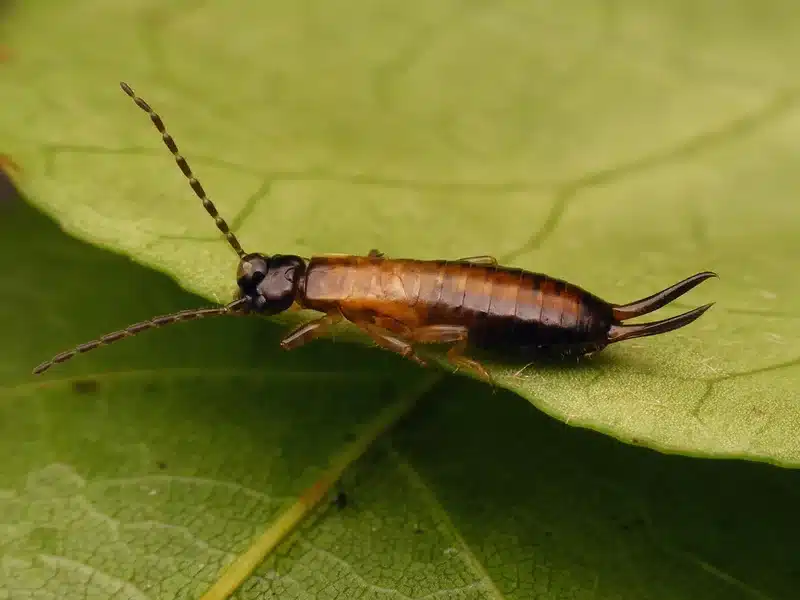
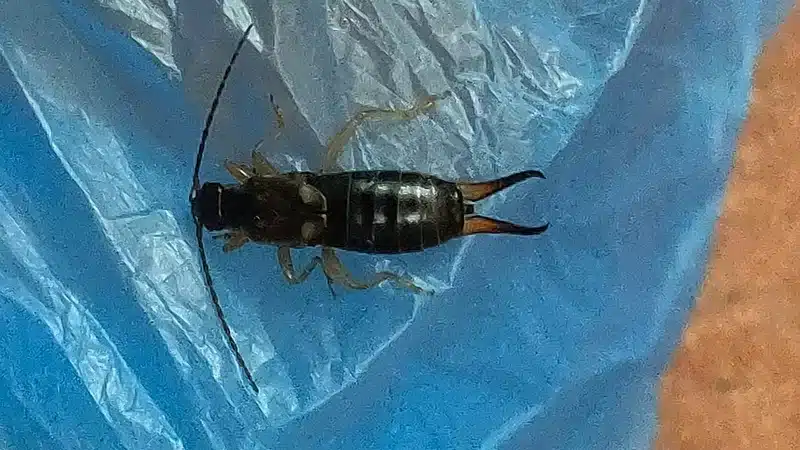
Proper ID prevents wasted effort on the wrong pest. Our area has two main species: the European earwig and the smaller ring-legged earwig. Virginia Cooperative Extension notes that European earwigs cause most homeowner complaints.
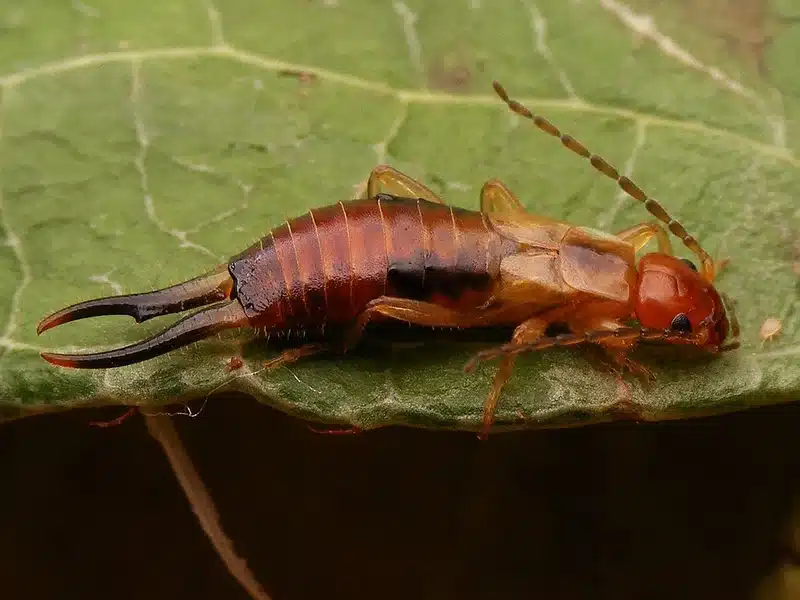
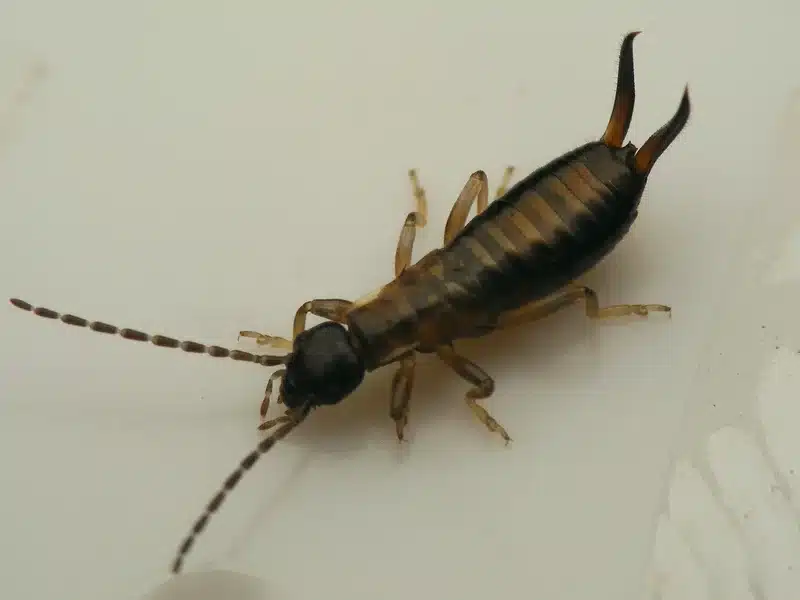

Adults are 13 to 25 mm long with flat, reddish-brown to black bodies. The pincers are the key feature. Males have curved pincers. Females have straighter ones. Their short, leathery front wings cover only the first belly segments.
People sometimes mix up earwigs and silverfish. Earwigs have dark coloring and prominent pincers. Silverfish are silver-gray with long antennae and no pincers.
Earwig Behavior
These insects are strictly night-active. During the day, they hide in mulch, leaf litter, stone piles, or cardboard. They come out at night to find food and moisture.
One generation per year in our region. Nymphs emerge from late April through May when soil temps top 55°F. Adult numbers peak June through August.
Earwigs dry out fast in open air. They crowd around damp basements, crawl spaces, and areas with poor drainage. When we inspect homes, we check these moisture zones first because that’s where earwig problems start.
Signs You Need Traps
Indoor sightings in basements, crawl spaces, or bathrooms signal an active outdoor population nearby. Earwigs rarely breed indoors because homes are usually too dry. But they will come in looking for moisture.
Plant damage is another clue. Look for uneven holes in flower petals, ragged leaf edges, or shallow pits in soft fruit. Unlike slug damage, earwig feeding leaves no slime trail.
We use glue boards during inspections as monitoring tools. Placed in humid areas, they confirm earwig presence. Our guide on earwigs in your house covers more warning signs.
Types of Earwig Traps
Oil-Pit Traps
Use vegetable or fish oil in shallow cans (like tuna cans) to catch foraging earwigs. University of California research shows these work well when checked daily.
Fill the can with about half an inch of oil. Bury it flush with the soil near mulch beds or plants where you see the most activity.
Harborage Traps
These use earwigs’ love of hiding spots against them. Roll up damp newspaper or use corrugated cardboard to create fake shelters. Put them out at dusk. Each morning, shake the contents into soapy water.
Board Shelter Traps
Simple plywood squares create monitoring stations. UC-Davis research found 6-inch boards highly effective for tracking populations at under $2 per trap.
Glue Boards
Glue boards work best indoors where dust and moisture won’t weaken the glue. Place them in dark, humid spots like under sinks or along basement walls.
Placement and Timing
Where to Place Traps
Focus on areas where you’ve seen earwigs or damage: mulch beds, flower borders, foundation walls, and near outdoor lights. Indoors, target corners, wall-floor junctions, under sinks, and along basement walls.
When to Start
Begin in late April when nymph emergence starts. Ramp up from June through August when adults peak. This timing also matches drought periods when earwigs seek indoor moisture.
Wind down in fall as earwigs prepare to overwinter. Keep some monitoring through October, especially after heavy rain.
Combining Traps with Other Methods
Trapping alone won’t fix a lasting earwig problem. The best results come from pairing traps with habitat changes and exclusion.
Reduce Moisture
Redirect downspouts away from your foundation. Fix irrigation leaks. Switch to drip systems in garden beds. These changes make your property less inviting and help traps work better.
Remove Hiding Spots
Clear thick mulch, leaf piles, and stacked lumber near your foundation. The less shelter earwigs find, the more effective your traps become.
Seal Entry Points
Fill foundation cracks. Install door sweeps. Maintain window screens. Weather-strip thresholds. Our guide on how earwigs get in your house has more prevention steps.
Change Your Lighting
Swap bright exterior lights for yellow “bug” LEDs. This cuts down on the flying insects earwigs eat, making your property less appealing.
When to Add Chemical Backup
Sometimes traps need help, especially during heavy infestations. Spinosad-based baits work well when spread around foundations at night during peak nymph season.
Products like Sluggo Plus target earwigs while being low risk for other creatures when used as directed. Apply around plant bases and foundation edges when you first notice nymphs, usually in late April or May.
Stronger perimeter sprays with carbaryl or pyrethroids can knock down severe problems. But we use these only as spot treatments since they affect other ground-dwelling insects too.
Indoor aerosols give short-term relief but don’t stop new earwigs from coming in. Sealing entry points and cutting outdoor numbers works better long-term.
Tracking Results
Log your trap catches each week. Note the weather and nearby moisture sources. This data helps you find the best trap locations and predict when problems might get worse.
Earwig activity usually spikes 24 to 48 hours after significant rain or humidity. Adjust trap numbers based on catch trends. High-catch areas may need more traps. Low-catch spots might work better with traps moved elsewhere.
Professional Help
When DIY trapping isn’t working, professional assessment can find issues you may have missed. Our technicians — providing pest control in Jessup and across Maryland and Virginia — start with a detailed ID to make sure you’re dealing with earwigs and not a similar pest.
Our 78-Point Home Inspection covers entry points, moisture sources, and conditions that draw earwigs in. This often reveals problems in hard-to-reach areas like crawl spaces.
We use products vetted by our research team. Our approach removes 9 harsh chemicals common in the industry while keeping treatments effective.
If you’re struggling with earwigs, call us at 703-683-2000 or email info@bettertermite.com for a consultation.